
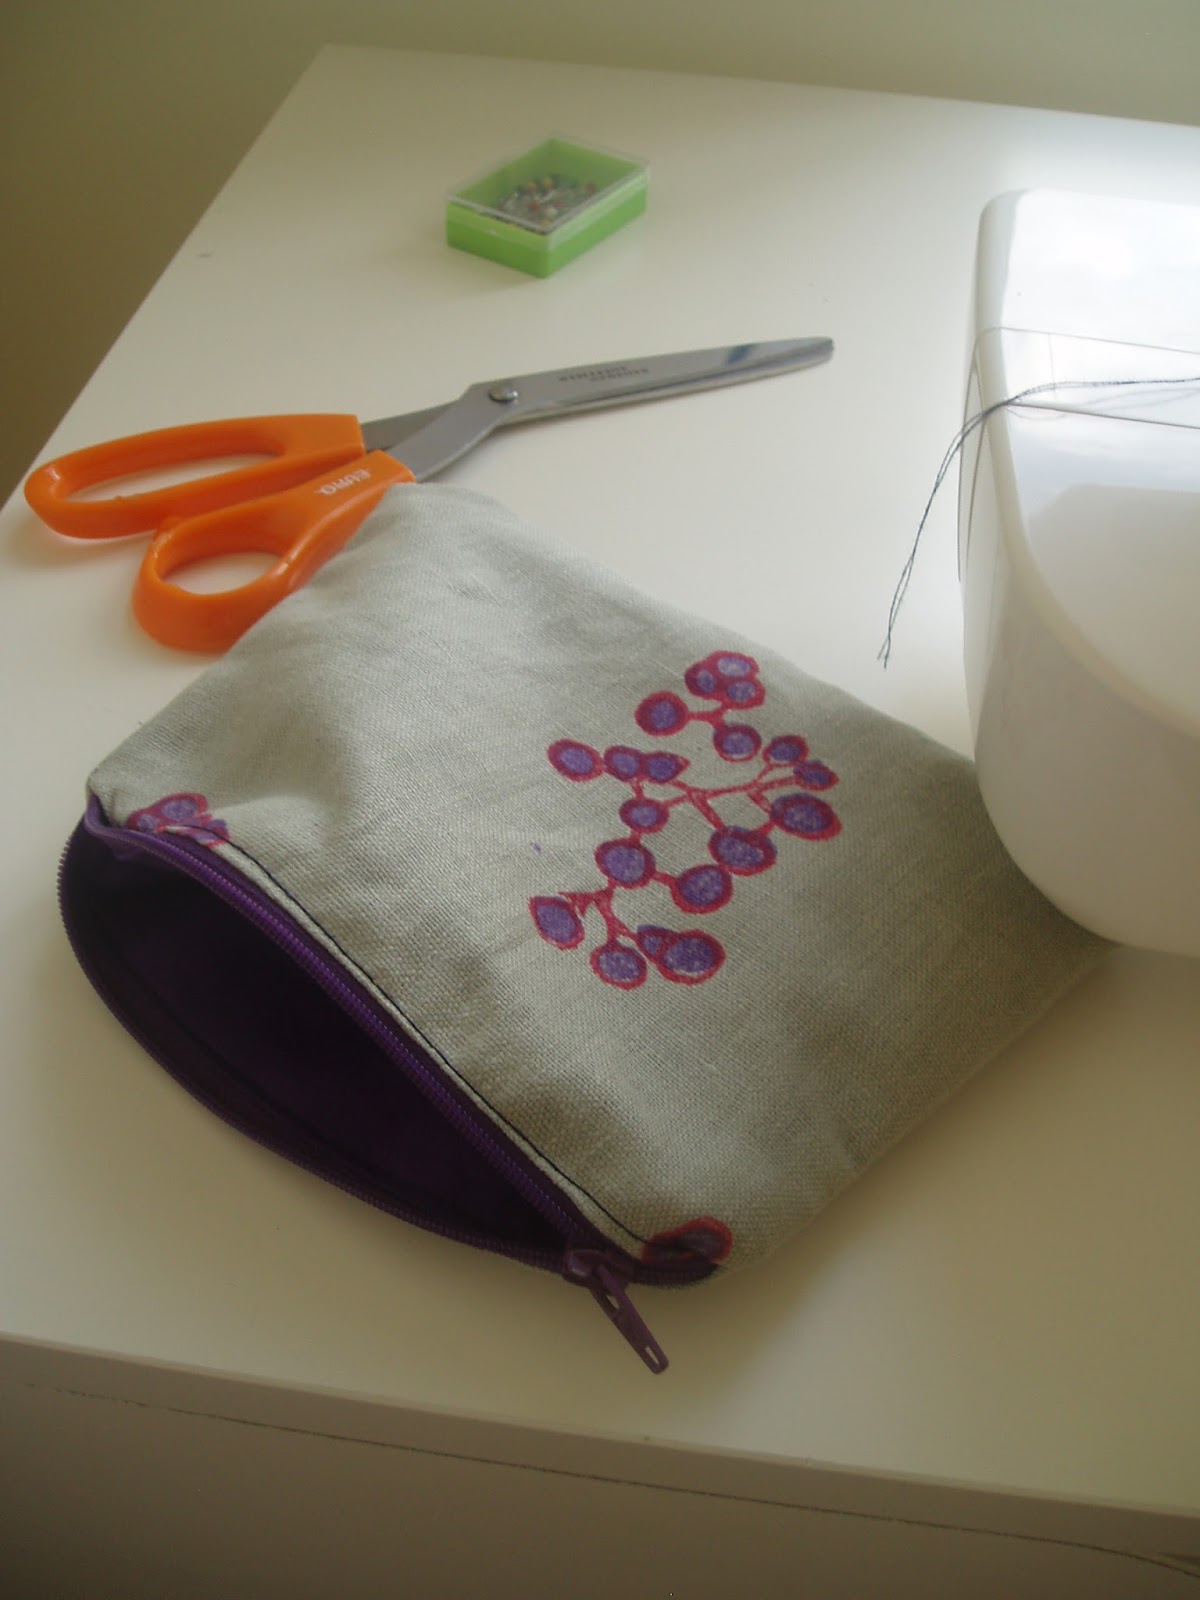
I printed some fabric with my berries lino blocks and made 3 pouches with zips using the fabric. Here's how to make the pouch...


First cut out the pieces - 2 pieces for the outer fabric and 2 for the lining. I drew around a pattern that is 15cm tall and 20cm wide at the base (15cm wide at the top),(about 6 x 8 inches). You can save and print and use this template I have drawn:

Then lay: a)the outer fabric right side up, b)a zip across the top edge of the pouch facing down and c)the lining material, right side down, on top of the zip. Pin together.

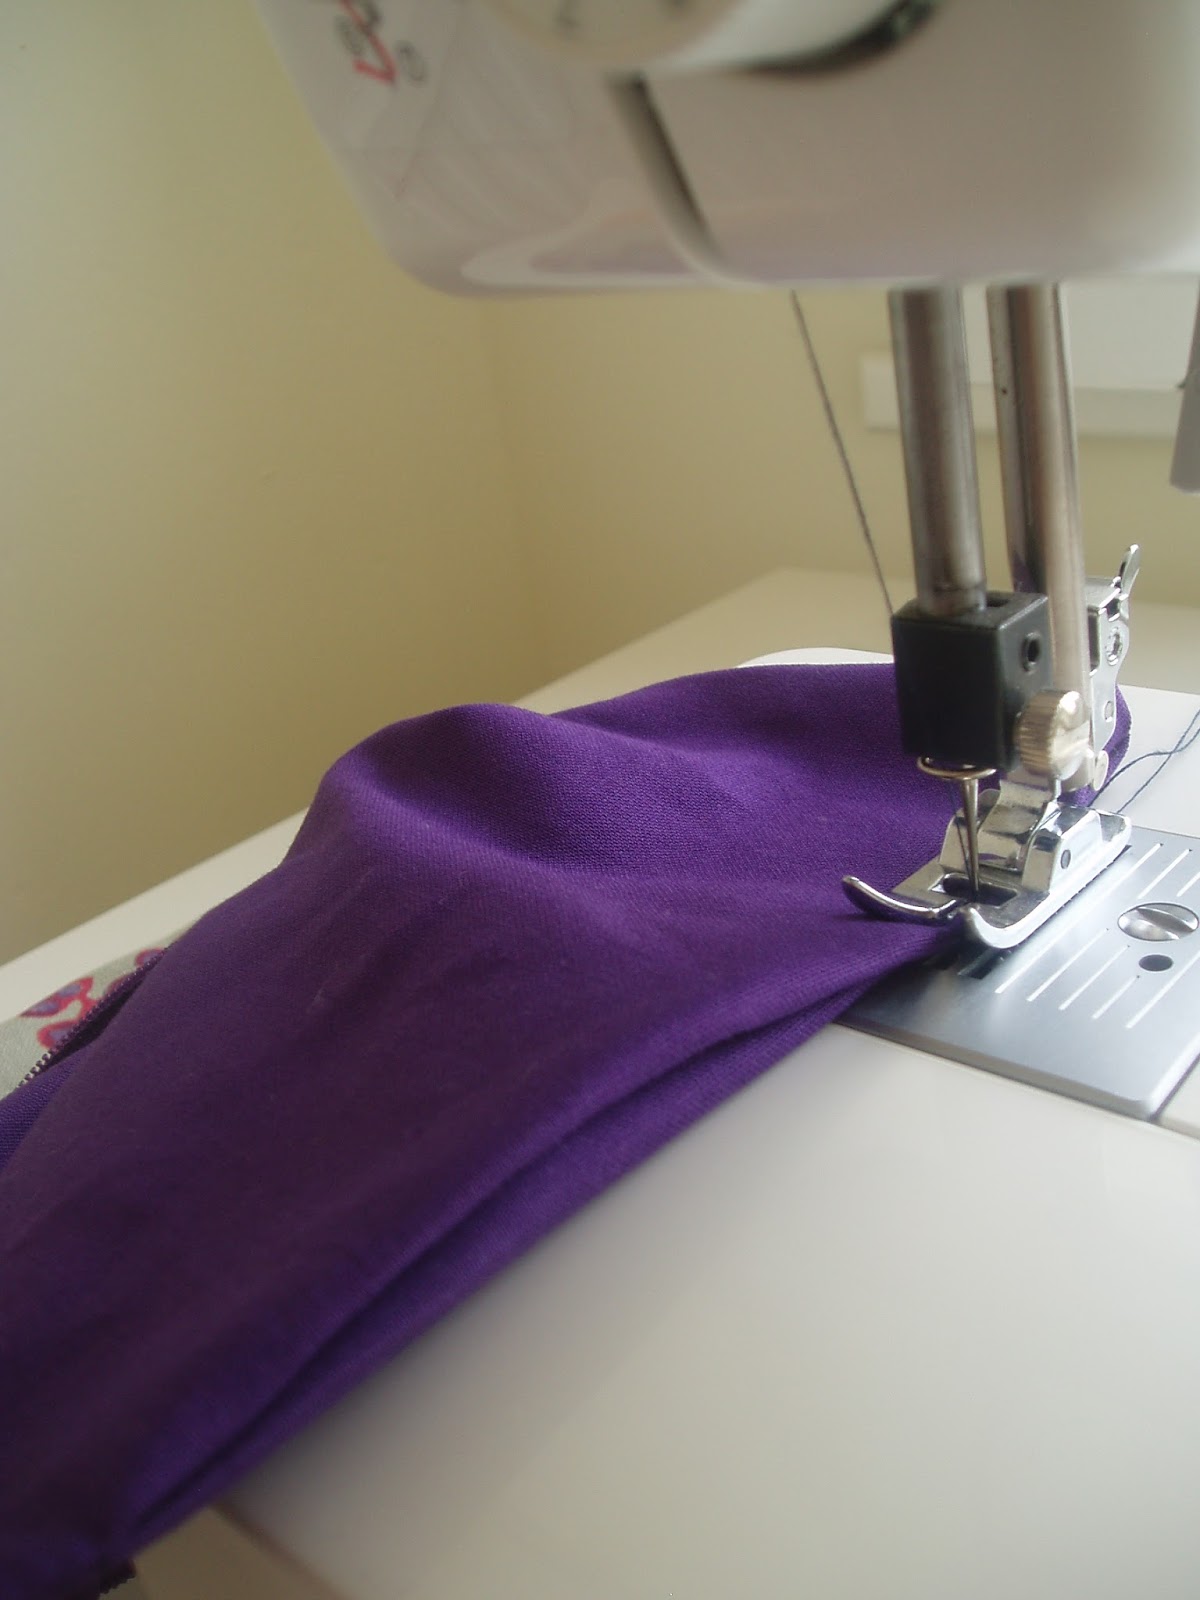
Put a zipper foot on your sewing machine and stitch the fabric and zip together.


Turn the stack upside down and repeat sewing the zip to a fabric and lining sandwich on the other side. Open the fabric out from the zip and iron it away from the centre.
 Then put the normal foot back on the sewing machine and top stitch either side of the zip - this holds the fabric back from getting caught in the zip.
 Next - this is important! Unzip the zip halfway (or you won't be able to turn your bag the right way out later on).
Then pull the outer pieces together (right sides together) and pin them, and the lining pieces together and pin them.
Sew around the whole pouch, leaving a gap about 3 inches wide at the bottom of the lining. When you come to the zip, just sew over it, ensuring that the zip is pressed down flat in one direction (towards the lining or towards the outer fabric) and the fabric is lined up underneath (without one side pulled higher than the other).


Trim the corners off the pouch and lining material - this makes it less bulky after you turn the bag out.

Turn the pouch right-side out, through the gap in the bottom of the lining. Check the pouch looks sewn correctly from the outside, then when you're happy with it sew up the gap in the lining by pinching the fabric together and top stitching along the gap (the stitching will be visible, but inside the pouch).

